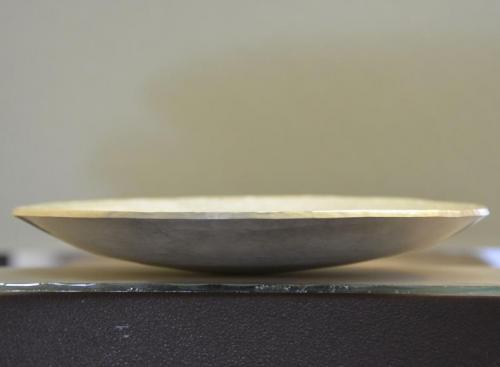
The original flat circle of sterling silver was 3 mm thick and 18 cm in diameter. I began by hammering this slightly thinner, stretching it out like a pancake to 23 cm across. This photograph shows the shallow bowl shape that resulted after 3 or 4 courses of raising.
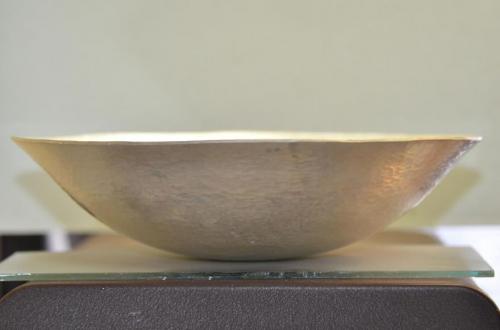
Being a thick sterling sheet, the raising process progressed slowly. This photo was taken after about 10 courses of raising. The edge thickness is noticeably thinner than in the previous photo.
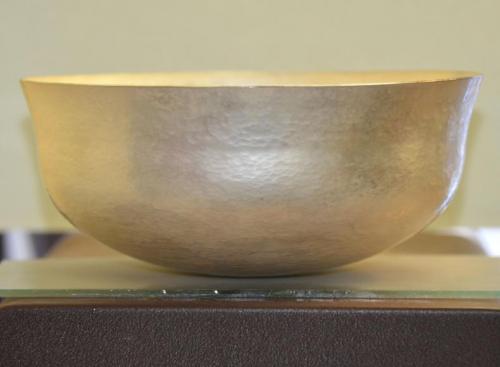
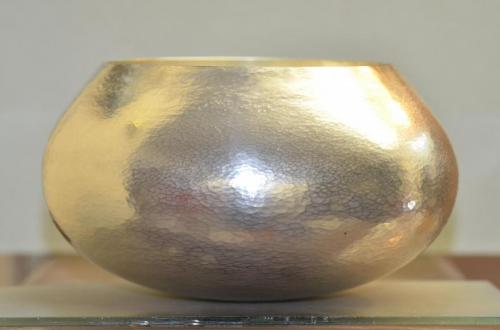
After at least 15 courses of raising, the circumference has been constricted in upon itself and the walls raised higher. In extreme slow-motion, the metal literally flows and redistributes itself as a plastic solid. The malleability and forces involved are comparable to those applied by a ceramic artist to clay at the potter's wheel, where a round slab is compressed in upon itself and pinched and drawn up into a tall vessel.
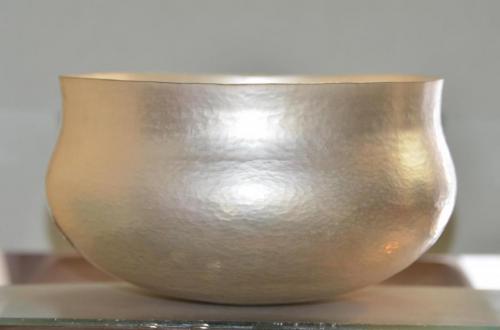
Now at over 20 courses, the lower half of the vessel has reached its final shape. From here on, all of the smithing is applied to the upper half. Slowly the circumference is constricted in upon itself (a thickening force), balanced by the metal being hammered between steel surfaces (a thinning force), and the top of the tea pot gradually closes in.
Six or seven partial courses later, the upper opening is smaller. The thickness at the edge, which started as 3 mm, is now 1 mm thick.
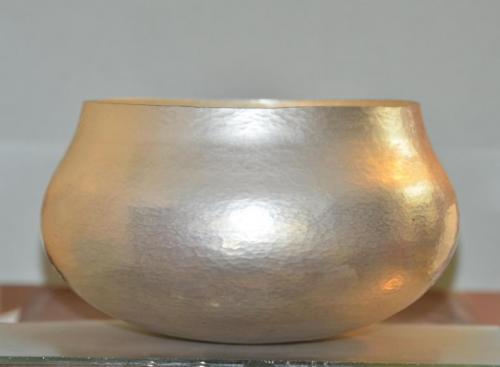
At 32 courses, the final form of the vessel has been achieved. The entire surface has then been planished or "ironed" smooth using a flat-faced hammer on the outside surface while always supporting the inside surface flush to a conforming steel shape.
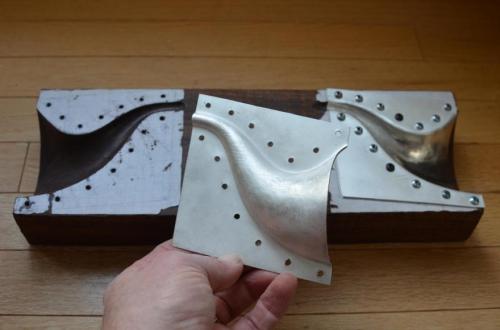
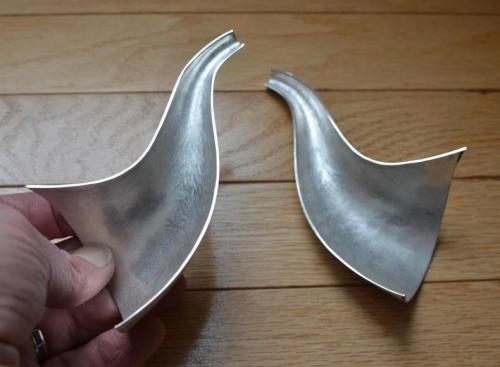
Next, the spout for the tea pot was created. I carved two precise half-spout shapes into a block of rosewood (the remainder of this wood later became the handles for the 4-piece service). Two 10 cm square sterling sheets were screwed down over the two half-spout molds. Using both ball-shaped hammers and rounded dapping tools, the limit of elasticity of the metal was exceeded and stretched into the wooden forms.
One of the half-spout shapes with its flange of sterling sheet is shown removed (it is possible to see evidence of the woodgrain pressed into the upper spout area). The flanges were then trimmed off both halves.
The flanges have been trimmed from both spout halves and their edges have been filed to fit perfectly flush.
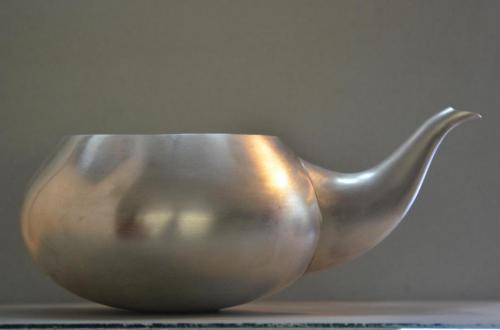
The spout halves are now soldered together and are precisely fit to the side of the tea pot. Both the spout and the pot have been filed and sanded to a satin finish. Before the spout was soldered in place, an asterisk-shaped series of holes was drilled into the pot to allow tea to flow through.
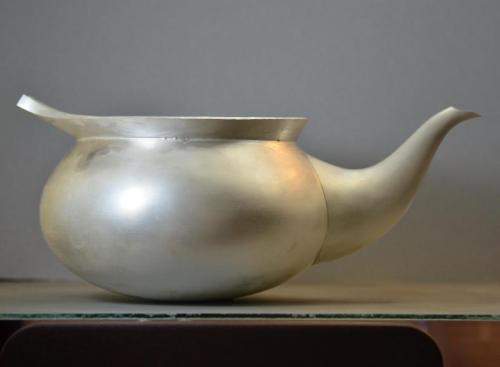
The rim and upper handle attachment has been forged and constructed, and is now soldered in place. The area that will receive the rosewood handle was built hollow to eventually allow the wood to lock inside. Care was taken to create a gradation of taper and thickness from the slender rim edge through to where the wood will attach.
This photo shows the hollow construction of the handle attachment area in the base. Two side "walls" have are already been soldered in place, and the upper surface of the hollow construction will soon be added. I tend to work with relatively thick sheet sterling, which allows me a bit of room to carve or shape contours and to correct slight inaccuracies of contour.
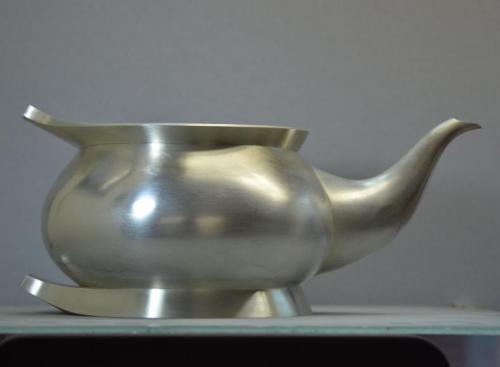
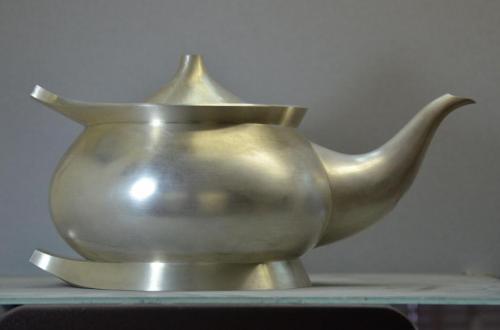
The base is now soldered in place. Care was taken to size it so that the round bottom of the pot itself hovered just above the table surface. The handle attachments on the bottom and top were lined up so that the rosewood handle would eventually be vertical.
A lid was then smithed (raised) and fit within the rim. A deep lip was soldered under the lid, the circumference of which precisely fit the round opening in the tea pot. At the top of the lid, a bottomed cylindrical component was soldered into the narrow opening to eventually receive the wooden handle.
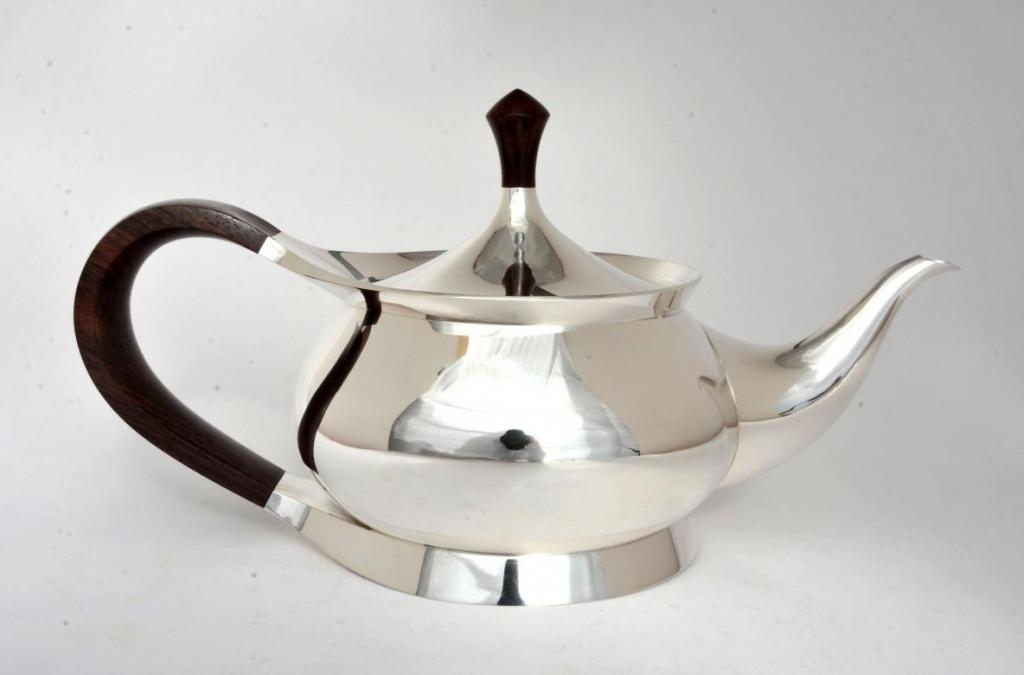
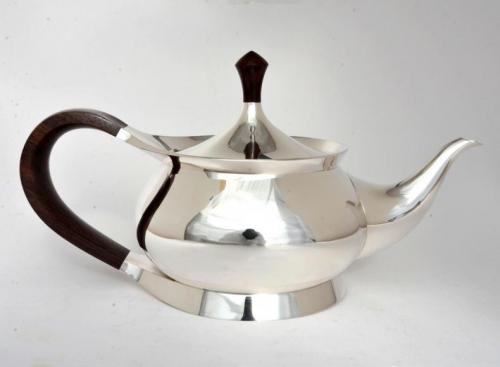
The finished Tea Pot. All sterling silver surfaces have been cleaned of fire-scale (tarnish due to heating) and polished. The rosewood handles have been carved, fitted, and attached with epoxy and blind rivets.