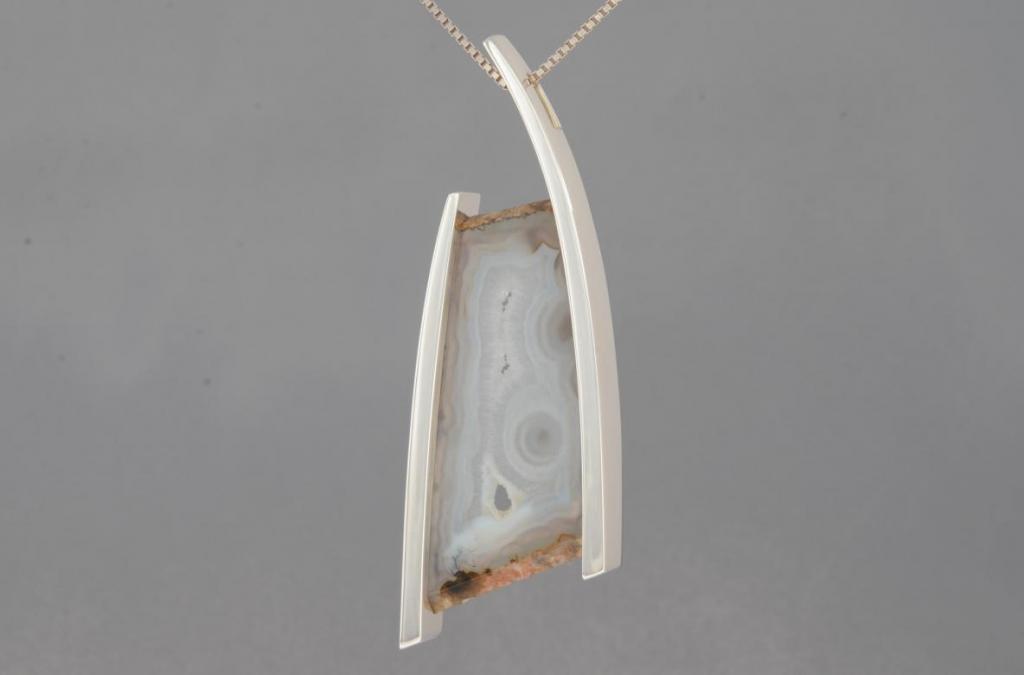
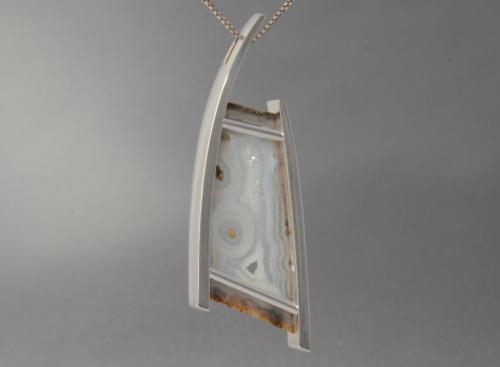
Gray and White Agate Pendant
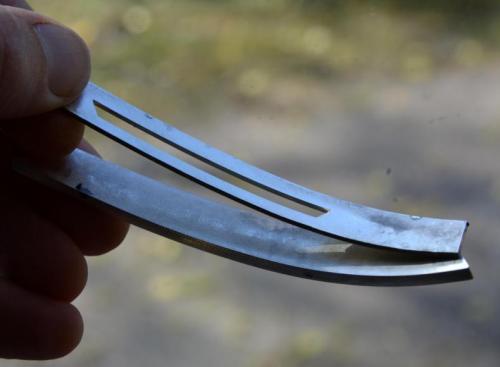
This shows what will become the right-hand arc of sterling. It is constructed of two layers. A slot has been pierced through the thinner layer that precisely fits the shape of the agate’s right edge.
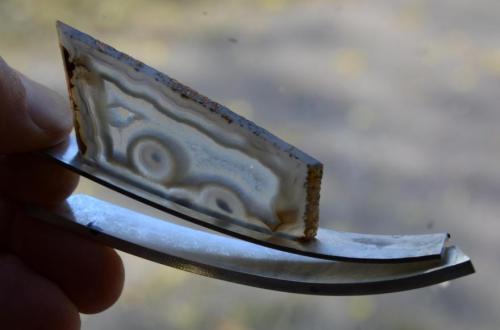
Here the agate friction-fits accurately in the slotted layer of sterling. It is important to “sneak up” on a precise fit. As I approach this, I repeatedly view the stone in the slot against strong back-lighting to see exactly where the pressure points are, and to avoid taking away too much metal in the wrong places. The slotted layer of sterling is 16 gu. thick (1.29 mm.) and the edge of the stone is recessed into it no more than 1.29 mm.
The two layers are now ready to be soldered together. Both curves are exactly the same. Here they are shown tightened together with 5 pieces of steel binding wire. Parenthetically, it is actually good if the outside edges of the two layers are not identical because it provides little “ledges” for the solder to enter the join.
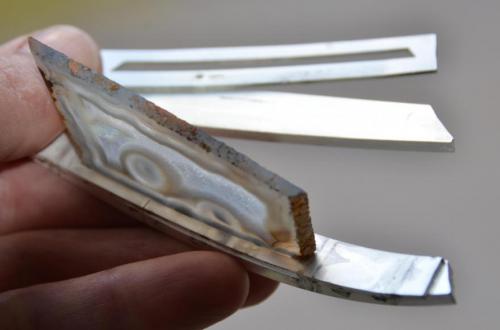
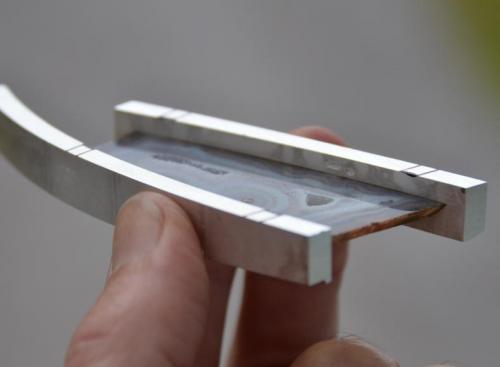
Both layers are now soldered together and the agate is again shown friction-fit in place. The solder was “fed” in from the outside edges (not into the slot itself). It is important not to flood the join with solder as any excess would create a rounded fillet within the slot and would spoil the precise fit of the stone. Also shown are two layers prepared for the second half of the framework.
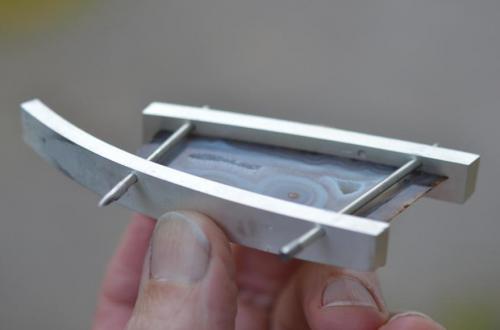
Both curved pieces are now constructed and are shown friction-fit to the edges of the agate. I have indicated with black marker where the rivets through tubing will eventually meet the framework.
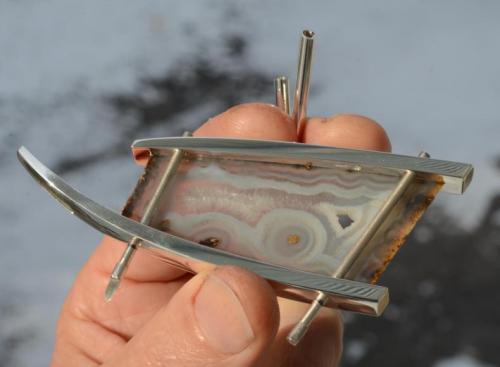
Four holes have been drilled and two rivet wires are shown temporarily in place. The space between the wires and the back surface of the stone is exactly the wall-thickness of the tubing that will need to go there.
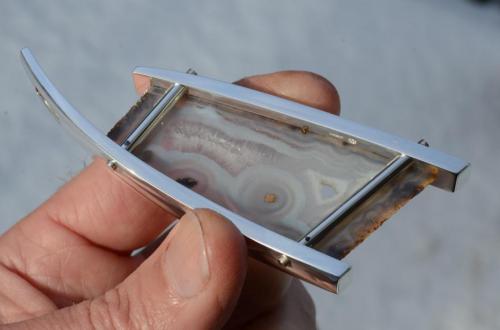
Much work has been done here. The shapes of the two frames have been subtly tapered and rounded on the outside, the hole for the chain has been pierced (barely visible in this photo), and all surfaces have been polished to a mirror finish. Also shown are two sterling tubes that have been cut to exactly fit the distance and angle between the frames along the rivet wires. The precision of this fit is important because, when the rivets are set, all the tightening must press against the ends of the tubing. No excess pressure can be exerted against the stone itself.
Both tubes have been polished and are in place. The precise fit can now be seen (while setting the rivets, all the pressure will be taken on the ends of the tubes). Both rivet wires have been trimmed and the holes on the outer surface of the frames have been tapered slightly wider.
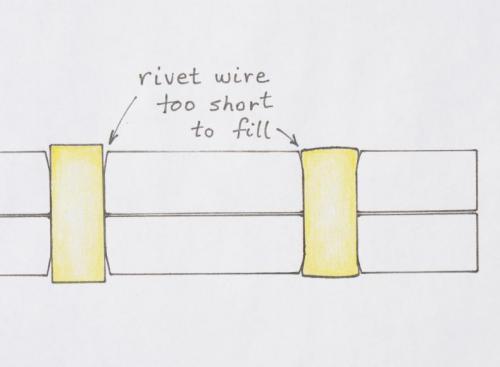
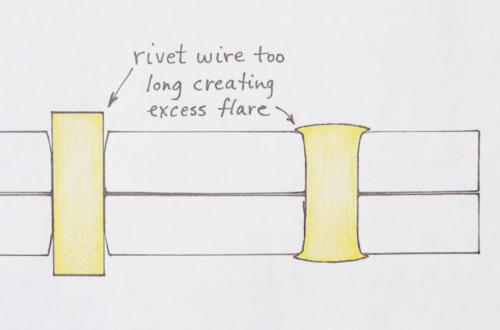
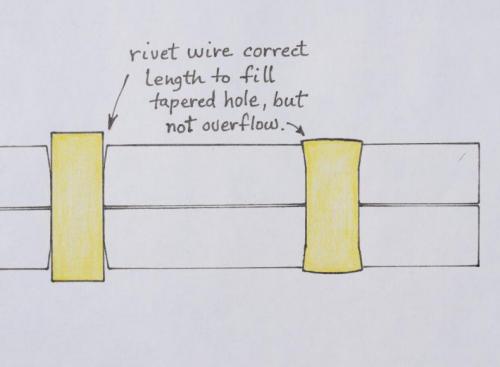
The following three diagrams show the “look” of rivet wires that are too long, too short, and just right. Many variables are at work here (the thickness of rivet wire, the extent of taper in the hole, etc.), but a picture is worth a thousand words...
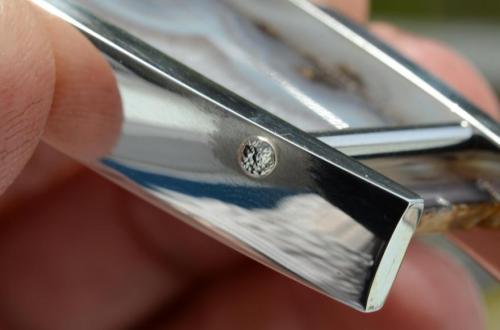
A detail photo showing one of the set rivets. Most of the tapping was done with a small ball pein hammer, taking care to center each tap in the middle of the rivet wire. Toward the end of the process, a ball-pein shaped tool is used in the Foredom “jack-hammer” handpiece to flow the metal precisely where needed (marks visible in the photo). Care is taken to not flare the rivet-head too wide up over the surrounding flat surface. At the same time throughout the process, it is important to observe that the rivet hole becomes entirely filled.
The finished piece as seen from the back. All excess metal from the rivet heads has been filed off flush to the surface. When carefully polished, there should be no evidence of the rivet head at all (ie: blind rivet). If polished too aggressively, the metal can drag out and show a circle between the rivet and its parent surface.