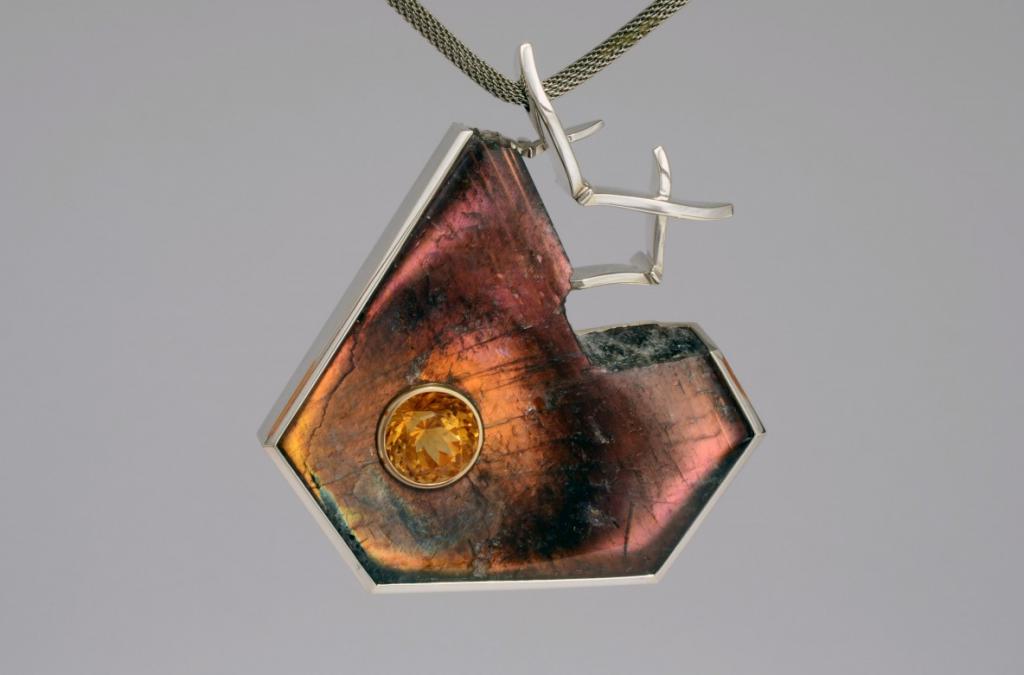
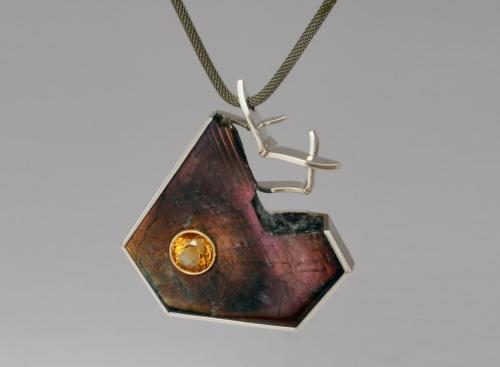
Purple Labradorite Pendant
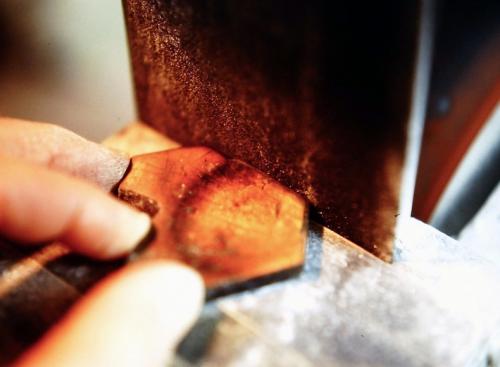
Vertical-sided edges of the labradorite are being shaped on a belt sander.
The contoured surface of the labradorite is carved, sanded and hand-smoothed as much as possible, then the surface is given its final polish by being firmly pressed against a spinning chamois wheel
(seen here) charged with tin oxide and a bit of moisture.
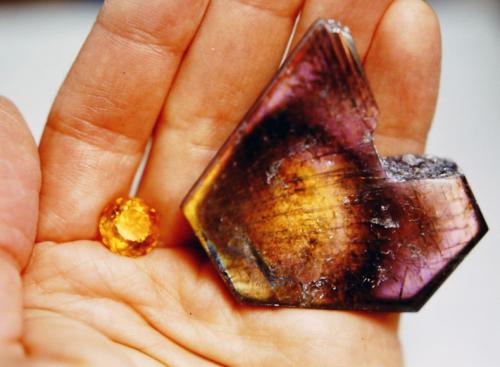
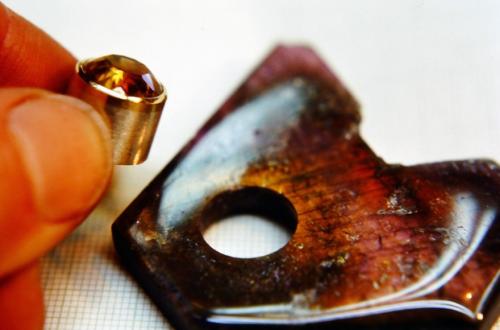
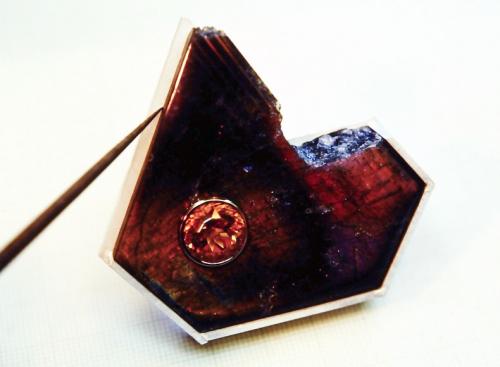
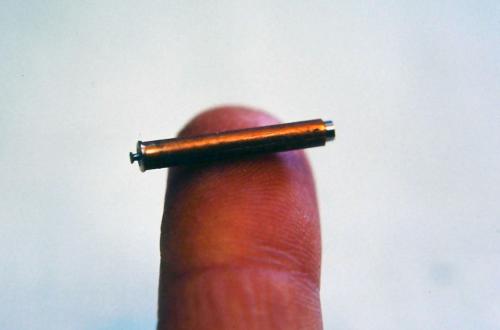
The polished labradorite showing the halo of orange iridescence within the purple, and a faceted yellow citrine that will become the brilliant "sun."
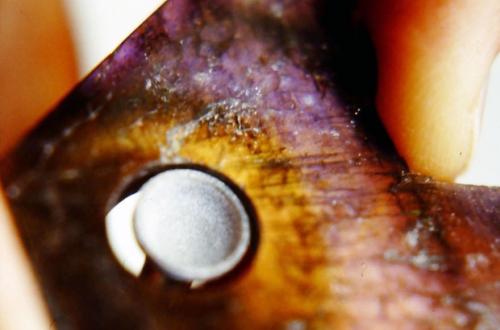
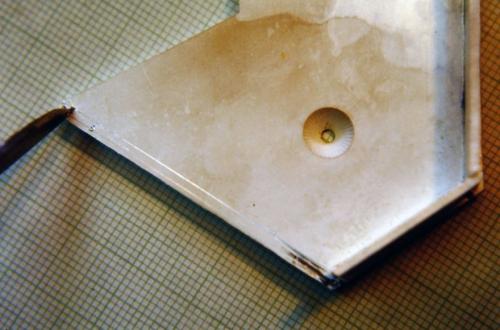
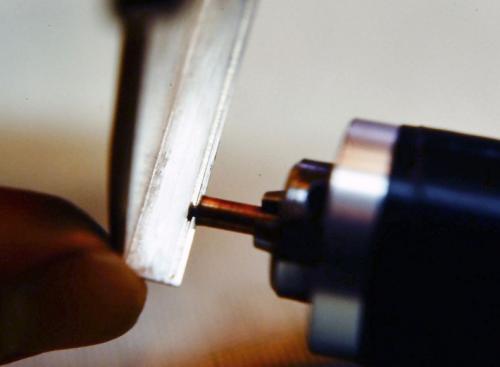
A hole for the citrine "sun" is being carved with a circular diamond burr. Labradorite is very brittle and will chip easily, such that the process of carving into it is done very slowly and gently.
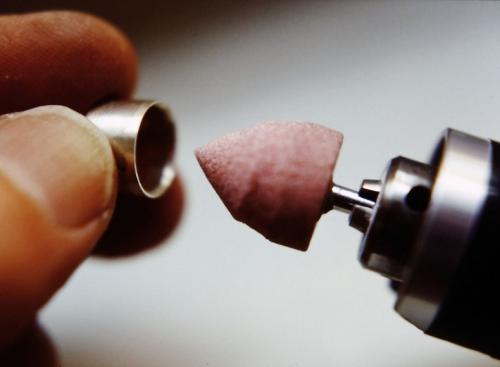
A sterling cylinder has been constructed that is exactly the same diameter as the round citrine. A grinding tool has been custom shaped to exactly the same angle as the underside of the citrine. It is being used to carve a seat in the cylinder to fit the stone.
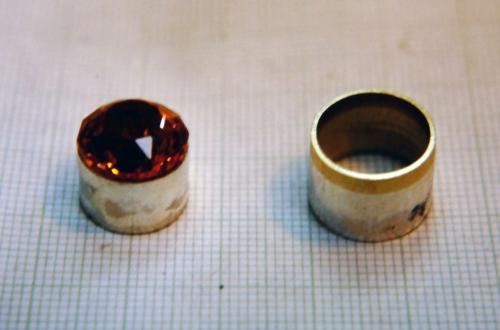
On the left is the cylinder with the citrine seated into it. This slides precisely into a second cylinder (on the right) which is constructed with a yellow gold rim. This yellow gold will be the metal used to bezel-set the citrine.
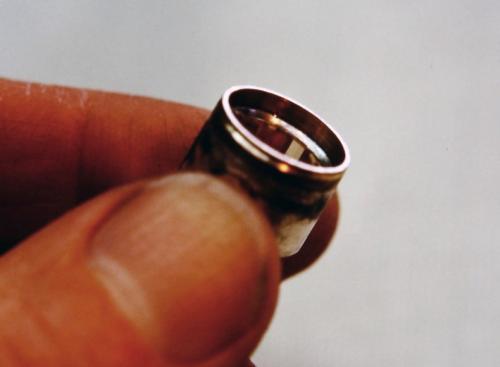
The two cylinders are soldered together. The beveled seat for the stone can be seen inside.
The citrine is now set in its yellow gold bezel. All tool marks have been filed off and the gold is polished. The outer cylinder shape is ever-so-slightly tapered, widest at its bottom and narrowest at the gold bezel. The hole in the labradorite is similarly tapered. When inserted from the back of the labradorite, therefore, the cylinder precisely presses into place and cannot go further through. A small amount of epoxy "locks" the parts together. The bottom of the cylinder is flush with the back of the labradorite such that, when set against a flat metal surface, the citrine cylinder would be physically unable to move.
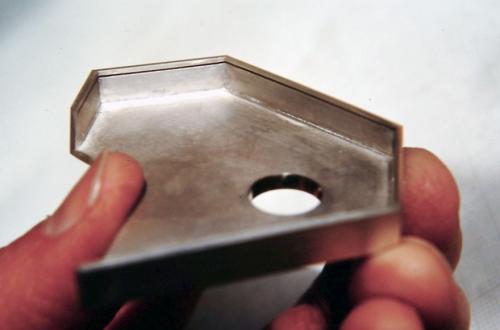
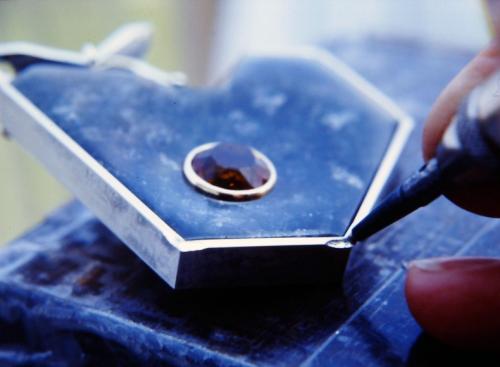
Four out of five sterling walls have been soldered in place on a 3 mm. thick sterling table. They are built to precisely fit around the edge of the labradorite. A fifth wall (not yet in place) will go along the upper left side of the stone in the photo. The labradorite temporarily serves as a template, and along its edge a distinct line is scratched into the sterling table (a sharp tool is shown scribing this line). This marks exactly where the inside edge of the fifth wall needs to be soldered.
Two parallel scribed lines can be seen where the fifth wall will be soldered. The inner line was scratched along the edge of the labradorite, and the outer line was similarly scratched along a sterling wall temporarily pressed against the side of the stone. The tool at the top of the photo is an engraver. Precisely along both lines, little engraved stitches are being curled up which will locate and lock the wall in place during the soldering. Note also that the hole for the citrine in its cylinder is only partly drilled into the back. The precise position of that hole can only be determined when all the walls for the stone are in place.
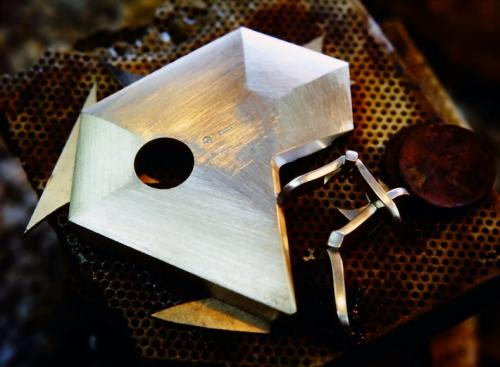
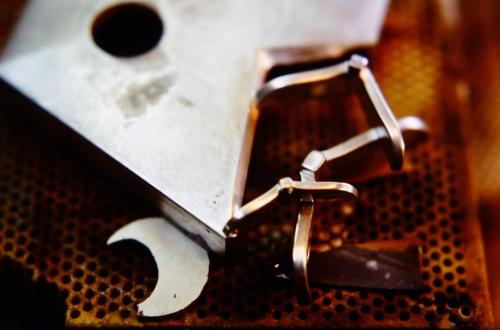
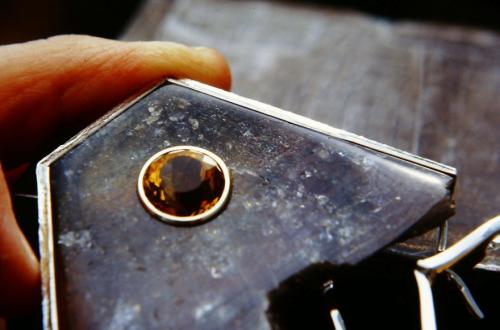
All five walls are soldered in place and the hole in the back for the citrine cylinder is accurately established. Two of the "birds of prey" are joined together and one wing-tip is positioned to be soldered to the pendant.
The wings of the third "bird" are ready to be soldered in two places.
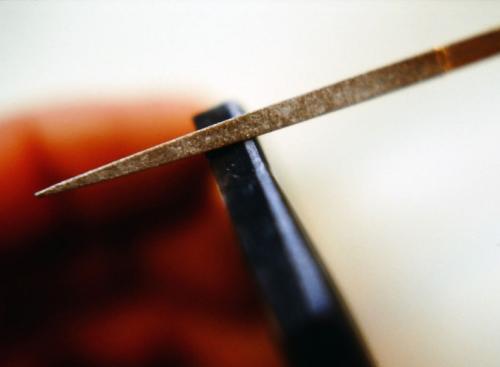
The next stage is to set the stone. Here the upper millimeter or so of the labradorite's vertical edge is slightly beveled with a diamond file (the light angle in the photo). Each file stroke is directed from right to left toward the back of the stone (as seen in this photo) to avoid any chipping along front edges. The top of the metal "walls" will be pressed/folded over to this beveled edge to secure the stone.
The process for setting the stone is one that I have figured out for myself (it may be common practice, but I devised it to meet my own desire to create clean stone settings with a feeling of thickness and substance to the metal surrounding the stone). I call it an "undercut bezel." The process involves customizing a tool. Here a small stone-setting burr has been tightly fit into a length of brass tubing. Most of the burr's pointed tip has been stoned off which renders the sharp outer edge of the burr like a miniature circular saw.
The customized tool is snugly tightened into the Foredom flexible shaft handpiece. The end of the brass tube serves as a guide along the upper edge of the sterling walls. The burr then cuts an absolutely straight groove of consistent depth along the upper inside edge of the walls. The depth should be no more than half the thickness of the wall. The distance down from the wall's upper edge to the groove is barely a millimeter.
The undercut bezel is cut and ready for setting.
The setting tool used is the Foredom attachment that works like a miniature jack-hammer. This photo shows the placement and angle at which the tool moves the metal. When worked at this angle,
the metal closest to the stone remains smooth. The corner areas of the wall are worked first. The metal literally flows across toward the stone while also folding along the undercut. Extreme care is
taken to move the metal only to the stone and no further (labradorite will instantly bruise and chip if pinched).
The stone has now been entirely set using the undercut bezel method.
The finished piece. All evidence of the stone-setting tool marks have been carefully removed, and all the metal surfaces have been polished.